
NextJs 14 — App Router and Unit Testing (w/ async pages)


Unit testing is pivotal in the Software Development Life Cycle, enabling rapid progress and code refactoring with confidence in the application’s functionality. It minimises production bugs, fosters creative problem-solving, and accelerates coding as the application scales.

This guide uses NextJs (Version ^14) with the App Router and Jest to set up the unit-testing framework. If you want to skip the step-by-step tutorial, jump to the end of the guide and visit the GitHub link.
Install NextJs
To start, let’s create a new NextJS application using: npx create-next-app@latest
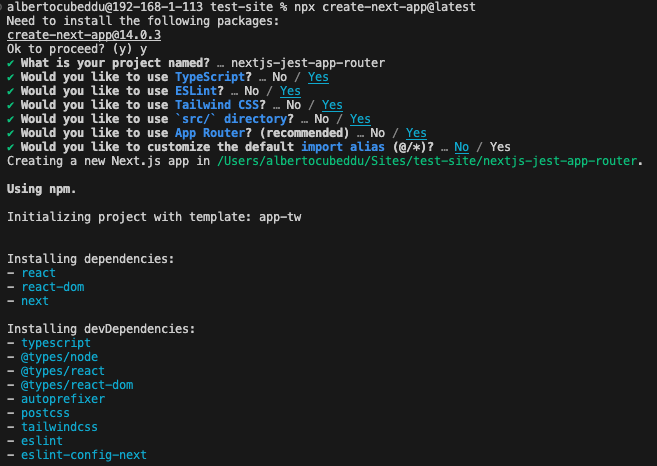
npx create-next-app@latest
The command will install a fresh version of NextJS (at the time of writing: 14.0.3) with the configuration specified above.
Install the Jest packages.
To enable the unit testing, we need to install different packages; please run the following command on your terminal inside the root directory of your application.

npm i -D jest jest-environment-jsdom ts-jest

npm i -D @testing-library/jest-dom @testing-library/react @testing-library/user-event

npm i -D @types/jest eslint-plugin-jest-dom eslint-plugin-testing-library
After running the command, your package.json should look like this:
"devDependencies":
    "@testing-library/jest-dom": "^6.1.4",
    "@testing-library/react": "^14.1.2",
    "@testing-library/user-event": "^14.5.1",
    "@types/jest": "^29.5.10",
    "eslint-plugin-jest-dom": "^5.1.0",
    "eslint-plugin-testing-library": "^6.2.0",
    "jest": "^29.7.0",
    "jest-environment-jsdom": "^29.7.0",
    "ts-jest":"^29.1.1"
  }
When you’re running the install, the version will most likely be updated; therefore, if they don’t match the above, that’s perfectly ok.
Configure the package.json
Now that the packages are ready, we must configure the runner. This involves modifying the package.json by adding these two lines under the "script"section
"test": "jest",
"test:watch": "jest --watchAll"
The first command is accessible via npm jest , and it initiates the manual test run. The second commandnpm jest:watch is designed to automatically execute the test upon any changes, triggering a test run each time a test file is saved.
The script section inside your package.json should look like the below example:
"scripts": {
    "dev": "next dev",
    "build": "next build",
    "test": "jest",
    "test:watch": "jest --watchAll",
    "start": "next start",
    "lint": "next lint",
  },
Configure Jest
To bootstrap jest, we need to create a file in our root directory named: jest.config.mjs and copy/paste the below
import nextJest from 'next/jest.js'


const createJestConfig = nextJest({
  // Provide the path to your Next.js app to load next.config.js and .env files in your test environment
  dir: './',
})

// Add any custom config to be passed to Jest
/** @type {import('jest').Config} */
const config = {
  // Add more setup options before each test is run
  setupFilesAfterEnv: ['<rootDir>/jest.setup.js'],
  testEnvironment: 'jest-environment-jsdom',
  preset: 'ts-jest'
}

// createJestConfig is exported this way to ensure that next/jest can load the Next.js config which is async
export default createJestConfig(config)
Node.js will treat .cjs files as CommonJS modules and .mjs files as ECMAScript modules.
Create another one called: jest.setup.js
import '@testing-library/jest-dom'
Configure Linting
Open up .eslintrc.json and add the plugin we’ve installed in the first part of the guide. Your file should look like this:
{
  "extends": [
    "next/core-web-vitals",
    "plugin:testing-library/react",
    "plugin:jest-dom/recommended"
  ]
}
ESLint statically analyses your code to find problems quickly. It is built into most text editors, and you can run ESLint as part of your continuous integration pipeline. Find issues, Fix problems automatically and give the ability to configure everything!
After finishing this configuration, we’re ready to start.
Dry Run
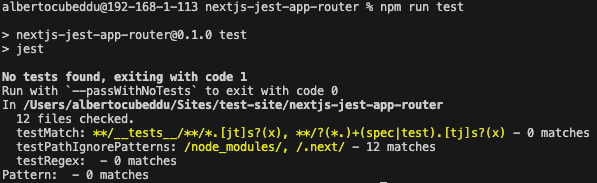
Run the command npm run test to check everything is installed and working:
Write your first test
Using the page provided by the next.js installation, let’s start running the application using: npm run dev and visiting the URL:
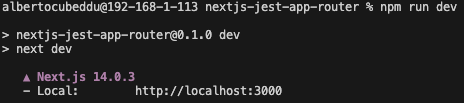
After visiting the URL, you’ll see the NextJS example page:
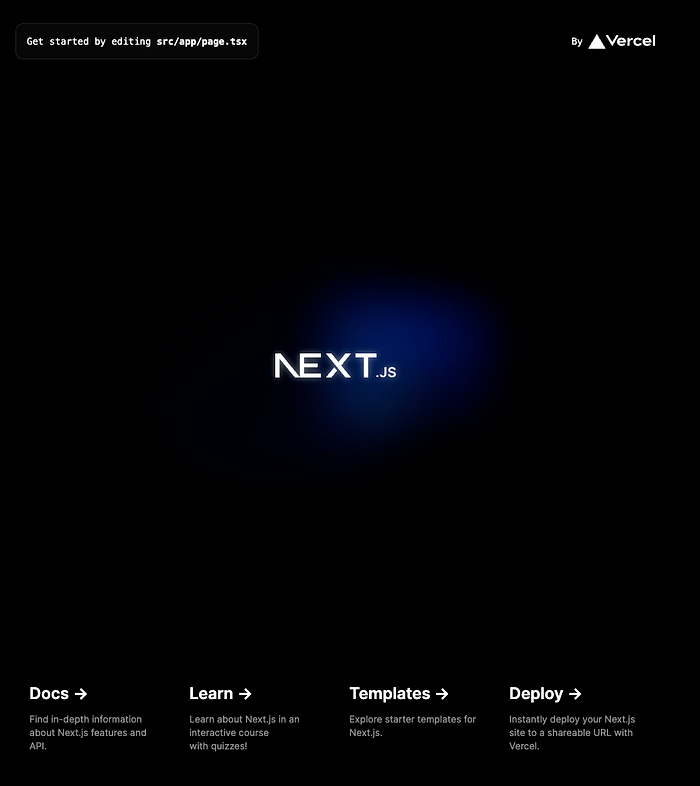
The source code for the page is located at src/app/page.tsx and the function is called Home.
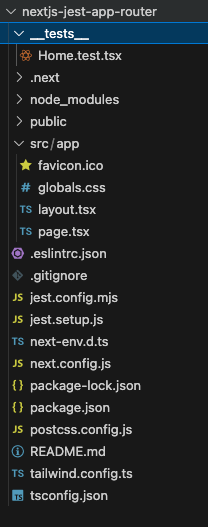
Following the naming convention, I usually name the test file after the function. In this example, the file is called: home.test.tsx. While you can save the file in the same folder as your page resides, I opt to group all my tests in a single directory.
Write a simple Jest test
Open the Home.test.tsx and start writing your test. To ensure everything works fine, copy-paste this example:
import { render, screen } from '@testing-library/react'
import Home from '@/app/page'
import '@testing-library/jest-dom'

describe('Home', () => {
    it ('Should Have Learn Text', () => {
        // Arrange
        render(<Home />)

        // Act
        const LearnText = screen.getByText('Learn')

        // Assert
        expect(LearnText).toBeInTheDocument()
    })
})
Where we are looking for the word “Text” in our page, exactly this section below:

If you run npm run test or npm run test:watch it would help if you got a success from your test suite:
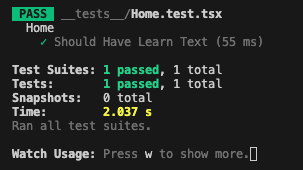
On the other hand, if you get an error, feel free to contact me, and I’ll help you fix it.
Write an ASYNC Page Jest test
Thanks to
we are expanding this guide to include async testing based on page.
Following the example on how to fetch data from the NextJS documentation:
async function getData() {
  const res = await fetch('https://jsonplaceholder.typicode.com/todos/1')


  if (!res.ok) {
    // This will activate the closest `error.js` Error Boundary
    throw new Error('Failed to fetch data')
  }

  return res.json()
}

export default async function AsyncPage() {
  const data = await getData()

  // Return JSX that properly displays the data
  return (
    <main>
      <h1>Todo Details</h1>
      <p><strong>User ID:</strong> {data.userId}</p>
      <p><strong>ID:</strong> {data.id}</p>
      <p><strong>Title:</strong> {data.title}</p>
      <p><strong>Completed:</strong> {data.completed ? 'Yes' : 'No'}</p>
    </main>
  );
}
Following best-practices for UNIT-Testing, before testing this function we must mock the response of the API call;
global.fetch = jest.fn(() =>
    Promise.resolve({
        ok: true,
        json: () => Promise.resolve({ userId: 1, id: 1, title: 'Test Todo', completed: false }),
    })
);
Adding the global.fetch before run our test, will allow us to mock the native fetch funcion, available in NextJS 14 by default.
If you need to run an integration test*, unfortunately i haven’t found a solution to run the fetch native functionality in JEST, unless i don’t use one of the “replacement” library; However the latter doesn’t ensure your code run as it would with the native function you’re using.*
The final snippet would look like this:
import { render, screen } from '@testing-library/react'
import AsyncPage from '@/app/asyncpage/page'
import '@testing-library/jest-dom'

describe('AsyncPage', () => {

    it('Should Have User ID and Completed', async () => {
        // We are mocking the global.fetch as we're doing unit-test.
        // In case of integration-test, you must include one of the fetch-library to be included.
        // FYI: I wasn't able to include the fetch that next.js loads by default. If you know how to do, open a pull-request.
        global.fetch = jest.fn(() =>
            Promise.resolve({
                ok: true,
                json: () => Promise.resolve({ userId: 1, id: 1, title: 'Test Todo', completed: false }),
            })
        );

        //////////
        // Arrange
        //////////
        render(await AsyncPage());

        //////////
        // Act
        //////////
        // Wait for the data to be fetched and rendered, the AWAIT here is crucial.
        const titleElement = await screen.findByText(/Test Todo/i);

        //////////
        // Assert
        //////////
        expect(titleElement).toBeInTheDocument();
        // Now you can use the screen.
        expect(screen.getByText(/User ID:/i)).toBeInTheDocument();
        expect(screen.getByText(/Completed:/i)).toBeInTheDocument();
    })
})
Conclusion
This setup kick-starts your journey towards enhancing your application, significantly boosting productivity. It reduces time spent on manual testing and dramatically improves the reliability of your code.
Subscribe Today
If you found this content valuable, consider becoming a member to access exclusive insights like these. Subscribe Now to be the first to receive updates and emails about my latest work.
Follow me on LinkedIn
https://www.linkedin.com/in/alberto-cubeddu/
GitHub Link
If you wish to download a working version of the code, instead of following the guide step-by-step, clone this repository: https://github.com/albertocubeddu/nextjs-jest-app-router
Sponsored by: